Vanilla Ice Cream Recipe: The Perfect Treat with 5 Modern Twist

Equipment
- Medium saucepan
- Whisk
- Mixing bowl
- Fine-mesh sieve
- Plastic wrap
- Ice cream maker
- Airtight container
Ingredients
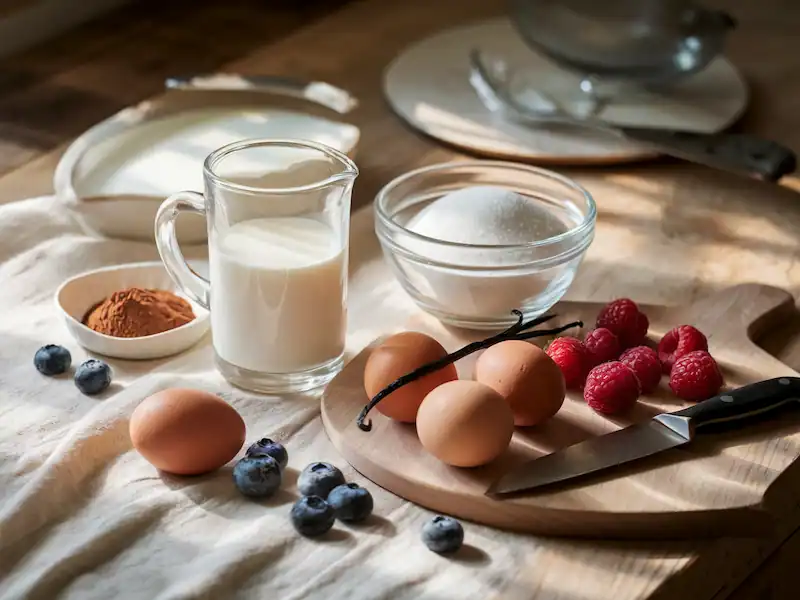
- 2 cups heavy cream
- 1 cup whole milk
- ¾ cup granulated sugar
- 1 vanilla bean or 2 tsp pure vanilla extract
- 5 large egg yolks
- Pinch salt
Optional Ingredients for Variations:
- ¼ cup cocoa powder for chocolate swirl
- 1 tbsp instant coffee optional
- ¼ cup crushed cookies or brownies
- ½ cup fresh berries or a fruit compote
Instructions
- Prepare the Vanilla Custard Base: In a medium saucepan, combine milk and heavy cream. Split the vanilla bean, scrape out seeds, and add both the seeds and pod. Warm over medium heat until steaming. In a separate bowl, whisk sugar, egg yolks, and salt until smooth.
- Temper the Egg Yolks: Gradually pour 1/2 cup of warm cream mixture into egg yolks, whisking continuously. Pour the tempered egg mixture back into the saucepan with the cream. Stir over medium-low heat until custard thickens, about 5-7 minutes.
- Strain and Chill: Remove saucepan from heat and strain the custard through a fine-mesh sieve into a clean bowl. Stir in vanilla extract, if using. Cover with plastic wrap and chill for at least 4 hours.
- Churn the Ice Cream: Pour the chilled custard into an ice cream maker and churn according to manufacturer’s instructions (20-30 minutes).
- Freeze Until Firm: Transfer to an airtight container, cover with parchment or plastic wrap, and freeze for at least 2 hours until firm. Serve and enjoy!
Notes
- Avoid letting the custard boil to prevent curdling.
- Homemade ice cream may melt faster due to the absence of stabilizers, so enjoy it fresh for the best experience.
Twists and Variations
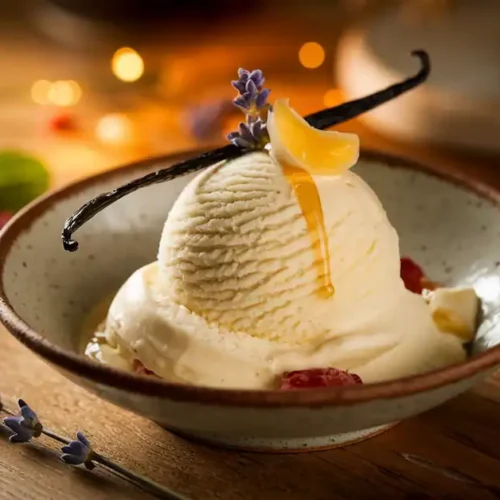
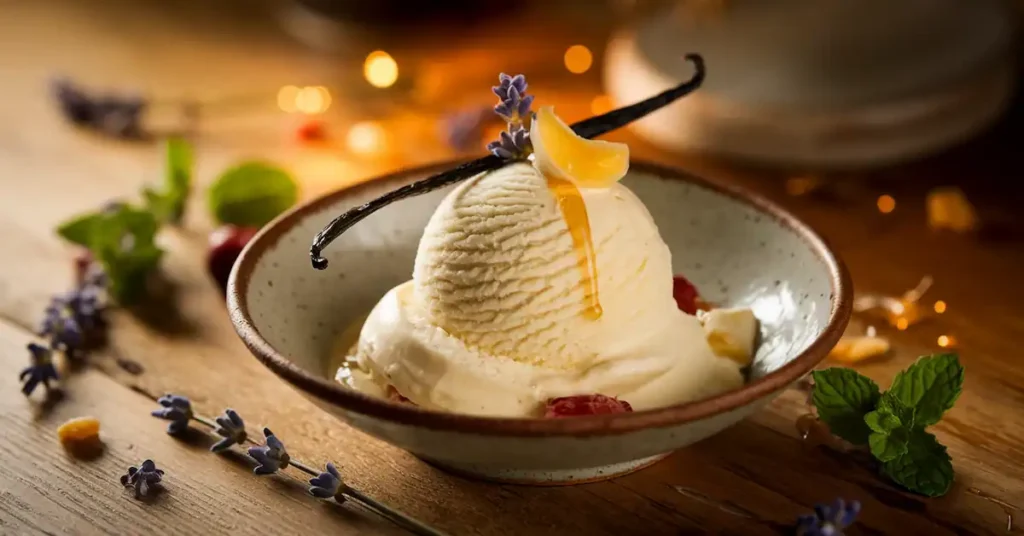
- Honey Lavender Vanilla Ice Cream: Add 1 tbsp dried lavender to the milk mixture while heating, then strain. Drizzle 2 tbsp honey during churning.
- Salted Caramel Swirl: Add swirls of salted caramel sauce during the last few minutes of churning.
- Citrus Zest Vanilla Ice Cream: Add zest of an orange or lemon to the cream mixture for a bright, refreshing twist.
- Brown Butter Crumble: Fold in a toasted brown butter oat crumble during the last few minutes of churning for a nutty, caramelized texture.
Tips for Perfecting
- Use Quality Ingredients: Opt for high-quality vanilla beans or pure vanilla extract for the best flavor.
- Chill the Custard Thoroughly: A well-chilled custard base helps achieve a smoother, creamier texture.
- Freeze Ice Cream Maker Bowl in Advance: Make sure the bowl is frozen solid for best churning results.
- Add Mix-ins with Care: Vanilla is a delicate flavor; mix in add-ins gently to avoid overpowering it.
- Serve Fresh for Best Texture: Homemade ice cream is creamiest and fluffiest when enjoyed fresh.
Table of Contents
Starting
There’s something timeless about homemade vanilla ice cream. The rich flavor of vanilla bean combined with the creamy texture of a freshly churned batch takes this dessert from a simple scoop to a homemade delight. Whether you’re craving a cool treat on a hot day or a versatile dessert to pair with cakes and pies, vanilla ice cream never disappoints. It’s easy to make, customizable to your preferences, and far superior to anything you’ll find in a store. Get ready for a flavor-packed adventure as we dive into the art of making vanilla ice cream with a few modern twists to surprise and delight your taste buds!
Preparation Time and Total Duration
- Preparation Time: 30 minutes
- Chilling Time: 4 hours (minimum)
- Churning Time: 30 minutes
- Total Duration: 5 hours
Ingredients

- 2 cups heavy cream
- 1 cup whole milk
- 3/4 cup granulated sugar
- 1 vanilla bean (or 2 tsp pure vanilla extract)
- 5 large egg yolks
- Pinch of salt
Optional Ingredients for Variations:
- 1/4 cup cocoa powder (for chocolate swirl)
- 1 tbsp instant coffee (optional)
- 1/4 cup crushed cookies or brownies
- 1/2 cup fresh berries or a fruit compote
Step-by-Step Instructions
1. Prepare the Vanilla Custard Base
- In a medium saucepan, mix together the milk and heavy cream. Split the vanilla bean lengthwise, scrape out the seeds, and add both the seeds and the pod to the mixture (if you’re using extract, save that for later). Warm the mixture over medium heat until it starts to steam, being careful not to let it reach a boil. You want it hot but not scalding.
- In a separate bowl, whisk together the sugar, egg yolks, and a pinch of salt until the mixture is pale and smooth.
2. Temper the Egg Yolks
- Gradually pour around 1/2 cup of the warm cream mixture into the egg yolk blend, whisking continuously. This process tempers the yolks so they don’t scramble when they meet the heat.
- Pour the tempered egg mixture back into the saucepan with the rest of the cream. Stir constantly over medium-low heat, cooking until the mixture thickens into a custard that coats the back of a spoon. This will take around 5-7 minutes.
3. Strain and Chill
- Once the custard thickens, remove the saucepan from the heat and strain the mixture through a fine-mesh sieve into a clean bowl. This step removes any solid bits, ensuring a perfectly smooth texture.
- If you’re using vanilla extract, stir it in at this point. Cover the custard with plastic wrap, pressing it directly against the surface to stop a skin from forming. Chill the custard for at least 4 hours, or overnight for best results.
4. Churn the Ice Cream
- After the custard has fully chilled, pour it into your ice cream maker and churn according to the manufacturer’s instructions. Typically, this takes about 20-30 minutes. The mixture will begin to thicken into soft-serve consistency.
5. Freeze Until Firm
- Transfer the churned ice cream into an airtight container. For extra protection against freezer burn, press a layer of parchment paper or plastic wrap directly onto the surface of the ice cream. Freeze for at least 2 hours until firm, then it’s ready to serve!
Serving Suggestions
Vanilla ice cream is the ultimate dessert base. It pairs well with a variety of dishes and can be served in many creative ways. Here are some suggestions for elevating your vanilla ice cream:

- With freshly baked pie: Classic apple or peach pie served warm with a scoop of ice cream is a match made in dessert heaven.
- In an ice cream float: Add a scoop to a glass of root beer or cola for a nostalgic treat.
- As a topping for brownies: The richness of chocolate brownies perfectly complements the smooth, creamy vanilla flavor.
- Served with warm berries: Heat up some mixed berries and drizzle them over a bowl of ice cream for a tart and sweet combination.
- In a waffle cone: A homemade waffle cone adds an extra layer of fun and crunch to your ice cream experience.
Storage Recommendations
To keep your homemade vanilla ice cream fresh, store it in an airtight container in the coldest part of your freezer (away from the door). Homemade ice cream tends to be a bit softer than store-bought varieties, so it will last about 2 weeks before it starts to lose its optimal texture. To prevent freezer burn, always press plastic wrap or parchment paper directly onto the surface of the ice cream. Before serving, let it sit at room temperature for about 5 minutes for easier scooping.
Nutritional Information
For one serving (1/2 cup):
- Calories: 220
- Total Fat: 15g
- Saturated Fat: 9g
- Carbohydrates: 18g
- Protein: 3g
- Sugar: 17g
Keep in mind that adding mix-ins like brownies, cookies, or caramel can increase the calorie count and sugar content.
Notes
- Make sure your custard doesn’t boil. Heating it too much can curdle the eggs, resulting in a grainy texture. Always cook the custard over low heat, stirring continuously.
- Homemade ice cream tends to melt faster. This is because it doesn’t contain the stabilizers that commercial brands use. Enjoy it fresh or straight from the freezer for the best experience.
History and Culture
Vanilla ice cream may seem like a simple dessert, but its history is quite rich. Originally, ice cream was a luxury reserved for royalty and the wealthy, with early versions found in ancient China and Persia. By the 17th century, ice cream started appearing in Europe, but it wasn’t until the early 19th century that ice cream became popular in the U.S. With the invention of the hand-crank ice cream maker in 1843 by Nancy Johnson, making ice cream at home became accessible to more people.
Vanilla became one of the most popular flavors due to its versatility. In America, it became iconic after Thomas Jefferson served vanilla ice cream at the White House. Today, vanilla is a staple in every ice cream shop and household.
Variations and Modern Twists
The classic vanilla flavor provides a blank canvas for countless exciting variations. Here are some fun and unexpected twists you can try:
1. Honey Lavender Vanilla Ice Cream
Add a tablespoon of dried lavender to the milk and cream mixture while heating. Strain out the lavender before proceeding with the recipe. Drizzle in 2 tablespoons of honey during the last few minutes of churning for a floral, subtly sweet ice cream.
2. Bourbon Vanilla Ice Cream
For an adult twist, add 1 tablespoon of bourbon to the custard before churning. The bourbon enhances the vanilla flavor and adds complexity without overpowering the ice cream.
3. Salted Caramel Swirl
Prepare a batch of salted caramel sauce and swirl it into the ice cream during the last few minutes of churning. The combination of creamy vanilla and salty-sweet caramel is divine.
4. Citrus Zest Vanilla Ice Cream
Add the zest of one orange or lemon to the cream mixture before heating. The citrus adds a bright, refreshing note that complements the richness of the ice cream.
5. Vanilla Bean with Brown Butter Crumble
Make a brown butter crumble by toasting oats, brown sugar, and butter in a skillet. Fold the crumble into the churned ice cream for added texture and a nutty, caramelized flavor.
Tips for Perfecting Vanilla Ice Cream
1. Quality Ingredients Matter
Since vanilla is the star of the show, opt for high-quality vanilla beans or pure vanilla extract. Avoid artificial vanilla, as it lacks the depth and complexity that pure vanilla offers.
2. Chill the Base Thoroughly
Chilling the custard base before churning is crucial for a smooth and creamy texture. Skipping or rushing this step can result in ice crystals forming, which will compromise the final product’s texture.
3. Freeze the Ice Cream Maker Bowl in Advance
If you’re using a home ice cream maker with a freezer bowl, make sure the bowl is frozen solid. This often takes 24 hours, so plan ahead to ensure your ice cream churns properly.
4. Be Creative with Mix-ins
Vanilla ice cream is like a blank canvas for mix-ins. Try folding in cookie dough, peanut butter cups, or roasted nuts in the final minutes of churning. Just be careful not to overwhelm the delicate vanilla flavor.
5. Serve Fresh for Best Results
While homemade ice cream can be stored, it’s at its best when eaten fresh, right after churning. The texture will be lighter and fluffier before it hardens completely in the freezer.
Vanilla ice cream may be a classic, but its simplicity allows for endless experimentation. Whether you enjoy it as is or decide to try one of the fun variations, there’s no denying the joy of homemade ice cream. So grab your ice cream maker and whip up a batch that’s sure to impress family, friends, and most importantly, yourself!
Check out our delicious Sherbet recipe here


ice cream, perfect for all days
pokpqv
wxv2p7
jl82b8
q3y6yc